FreeDV turns an ordinary HF radio into a digital voice station with nothing but a laptop and one USB cable. It is free, open source, and it runs on any SSB transceiver — no vocoder chips, no licence fees, no internet link. This guide explains what it is, how it works, and walks through a full setup on an Icom IC-7300 MK2.
Most digital voice modes you may have heard of — D-STAR, DMR, Fusion — need a radio with a special vocoder chip inside, and those chips cost licence fees. FreeDV took the other road. Everything is open source: the voice codec (Codec 2), the modem, and the software, all developed by the amateur radio community. Your radio only has to do what it already does well: send and receive an SSB signal.
How it works
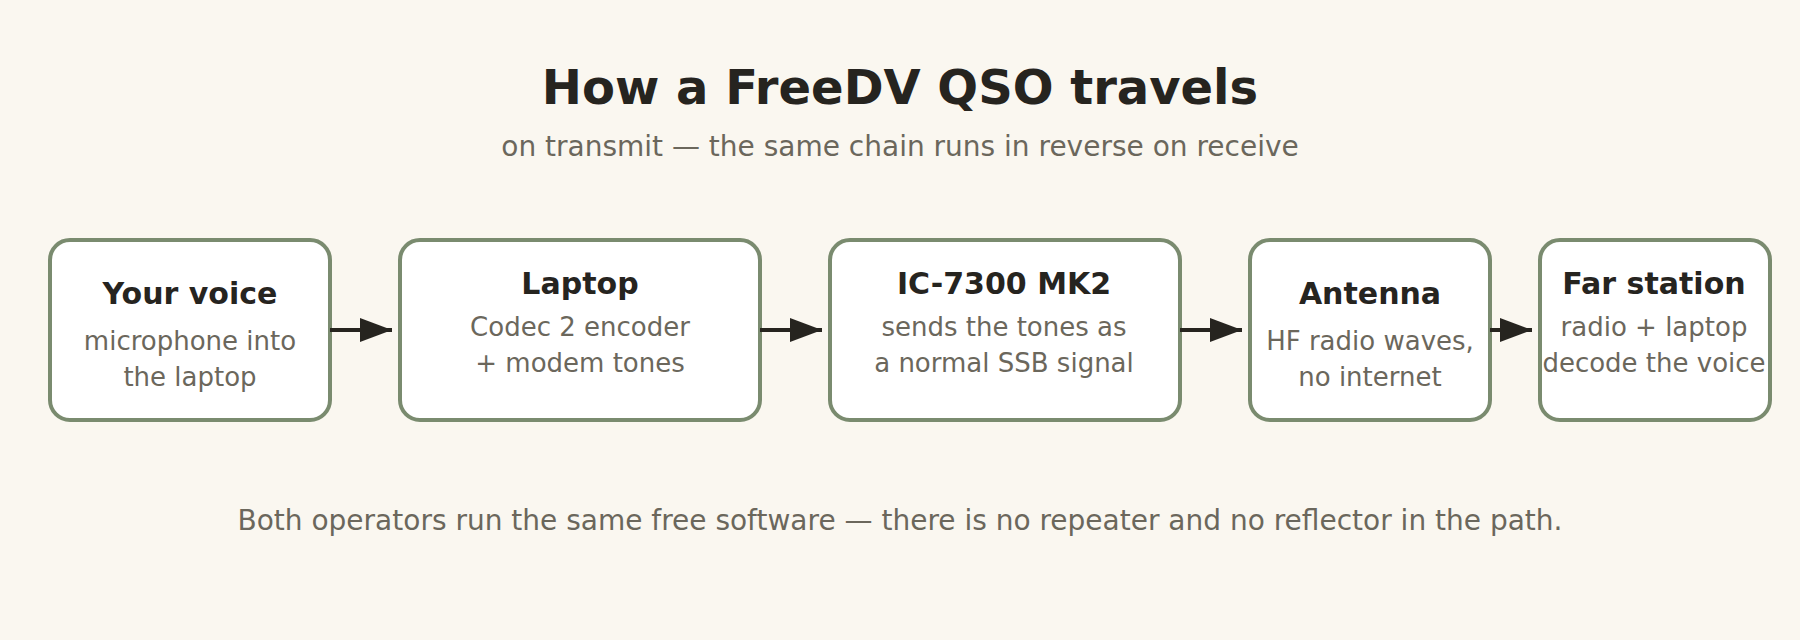
FreeDV has three parts, and all of them live on your laptop. First, the vocoder (Codec 2) squeezes your speech into a tiny data stream — roughly 700 to 1,600 bits per second, depending on the mode. Second, the modem turns those bits into a set of small audio tones. Third, forward error correction adds spare bits so the far side can repair damage from noise and fading.
Your radio then transmits those tones the same way it transmits your voice in SSB. The station on the other end receives them, and their laptop runs the same process backwards: tones back into bits, bits repaired, bits back into speech. Because the data carries a little text too, FreeDV can show the other operator's callsign on screen.
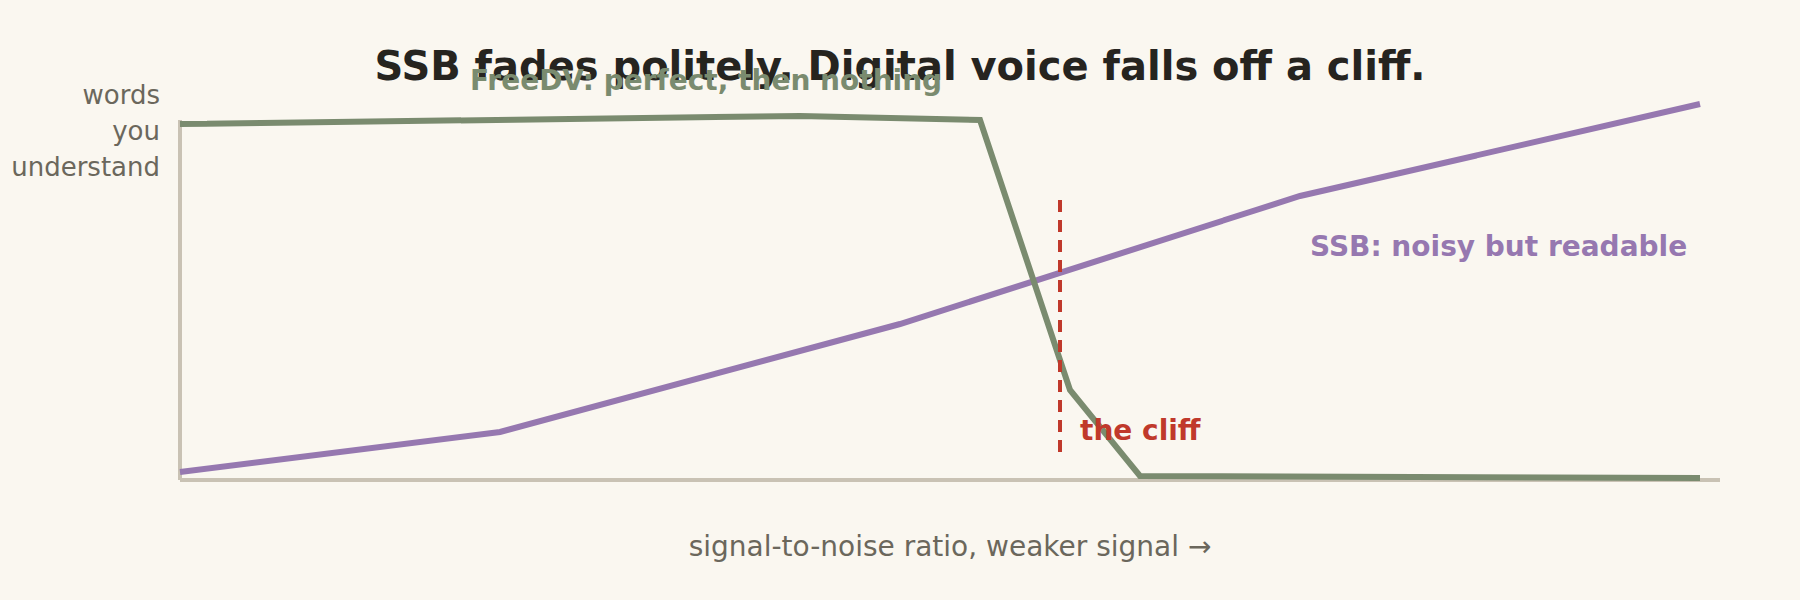
One behavior surprises most newcomers. Analog SSB degrades gently: as a signal gets weaker, it gets noisier but you can still follow the conversation. Digital voice stays perfect as the signal drops… until it suddenly does not. At a certain signal level, decode stops completely. This is called the cliff effect.
The modes
FreeDV offers several modes, and the choice is a trade-off between audio quality and how weak a signal they can survive. You simply pick the mode that matches the band conditions — and both stations must use the same one.
| Mode | Best for | Notes |
|---|---|---|
| 1600 | Clean signals (roughly 10 dB SNR and up) | The classic. Clearest audio, widest historical use. |
| 700D | Weak, fading signals | Decodes around 0 dB SNR. The all-round favourite for poor conditions. |
| 700E | Fast fading | Slightly better audio than 700D, similar robustness. |
| 700C | Fast fading on quiet bands | No error correction, but handles rapid flutter well. |
| 2020 / 2024 | Strong signals, high quality audio | Newer vocoder, much better sound, but it needs a good signal. |
| RADE | Everything, if both sides run a recent FreeDV | The newest generation — designed to be robust across most conditions. |
Why bother — and what to expect
The honest case for FreeDV: at signal levels where SSB is barely readable, FreeDV often sounds like a telephone call. It costs nothing, it works station-to-station without any repeater or internet gateway, and every part of it is open source. On a modest station this turns marginal propagation into usable QSOs.
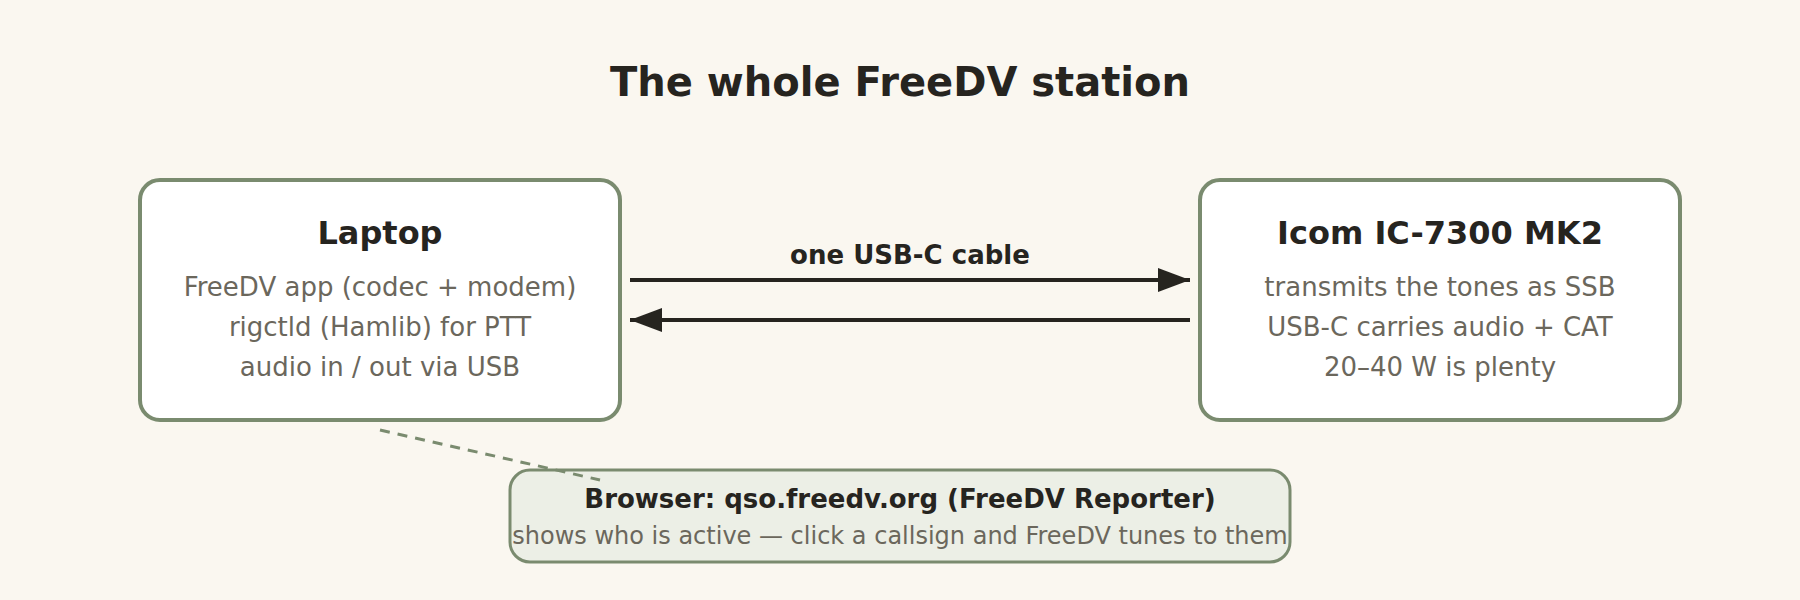
The honest limits: the community is much smaller than SSB, so you may sit alone on a calling frequency for a while. Both stations need matching modes and reasonably close FreeDV versions. And tuning matters more than with SSB — the other station decodes best when you are within a couple hundred hertz of the right spot. A web page called the FreeDV Reporter solves most of that: it shows who is on air right now, and clicking a callsign tunes your software to them.
What you need
- An HF transceiver with a data or USB interface — an Icom IC-7300 MK2 for this guide (my own radio), but the same idea works on most rigs
- A laptop or small PC — Windows, Linux or macOS
- One USB-C cable (the MK2 carries both audio and control over it)
- The FreeDV application, a free download from freedv.org
- Any working HF antenna — even a simple wire dipole is fine
Setting it up on the IC-7300 MK2
Two short checklists: one on the radio, one in the software. Allow about fifteen minutes the first time.
1 · On the radio (MENU → SET)
- Mode: USB-D (press USB, then DATA). In DATA mode the MK2 takes its audio from the USB port by default (Connectors → MOD Input → DATA MOD:
USB), so the microphone stays out of the signal - USB MOD Level: start at 50% — the fine adjustment comes later from the ALC meter
- Speech compressor (COMP): off — a digital signal wants clean, unprocessed audio
- CI-V Address: note it down. On the MK2 the default is
B6; the older IC-7300 used94. The software must match, or PTT will never key - Filter: use a 3.0 kHz filter (for example FIL1 set to 3.0k). The factory DATA-mode filters are narrow
- No baud rate to set: the MK2 has no "CI-V USB Baud Rate" item, and its USB link works at whatever rate the software asks for
2 · On the laptop
- Install FreeDV, connect the USB-C cable, and switch the radio on
- In FreeDV's Easy Setup, choose the radio's USB sound device as the Radio Device; your headphones and microphone stay on the laptop's own sound card
- For PTT and frequency control, pick Hamlib CAT Control in Easy Setup, rig model Icom IC-7300MK2, and the COM port of IC-7300MK2 Serial Port A (CI-V). FreeDV has Hamlib built in, so no separate
rigctldis needed. Do not pick the plain "IC-7300" model: it talks to address 94h, and an MK2 at B6h will never answer - Select mode 700D as your starting point
3 · Set the transmit level properly
Press PTT from FreeDV and watch the radio's ALC meter while raising the TX drive slider in small steps. Stop when the ALC indication only just ticks at the peaks. Pushing further makes your signal wider than it should be and splatters on neighbours.
Where to call
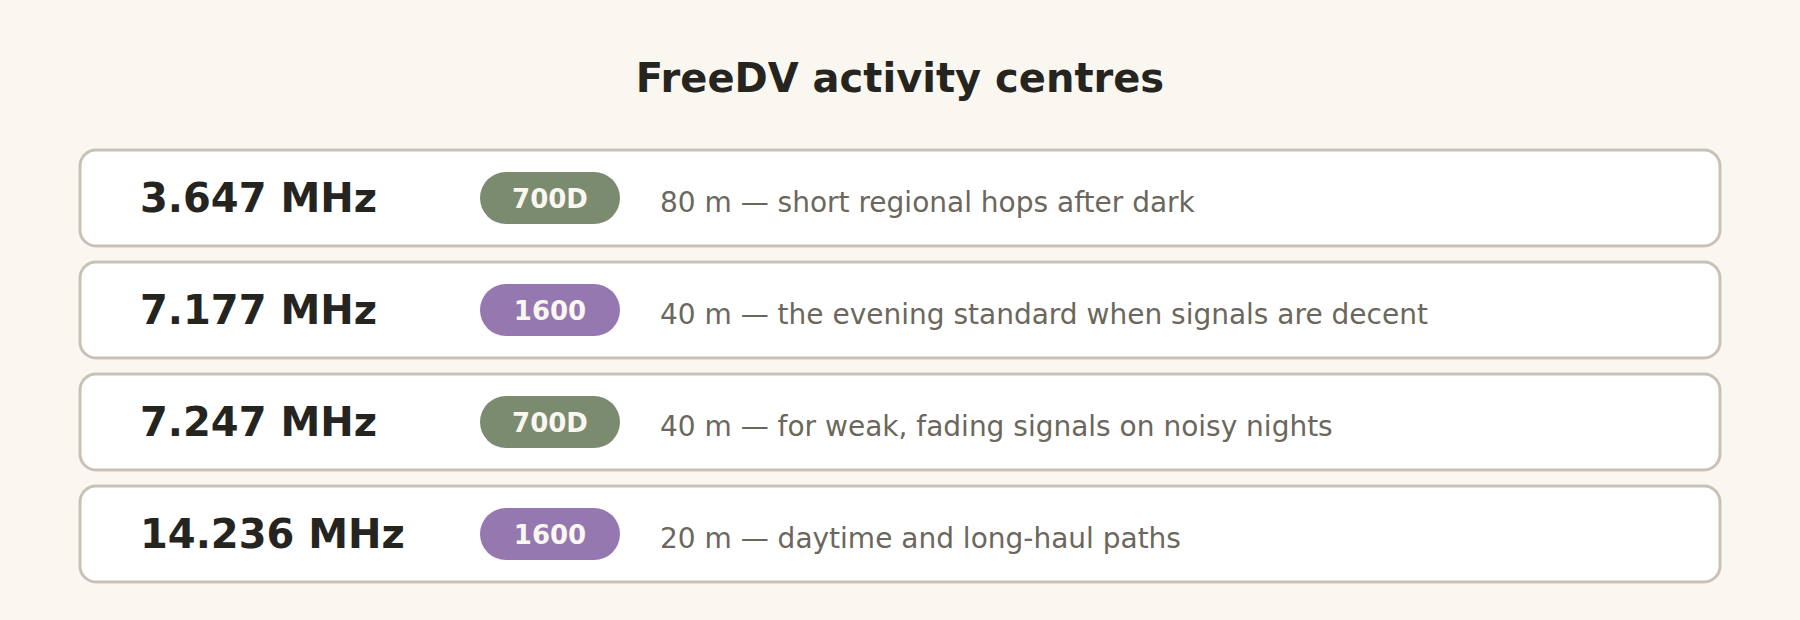
FreeDV operators gather on fixed calling frequencies. Tune the receiver so FreeDV shows a good sync, and you are in business.
| Band | Frequency | Mode | Typical use |
|---|---|---|---|
| 80 m | 3.647 MHz | 700D | Regional night band |
| 40 m | 7.177 MHz | 1600 | Evenings, decent signals |
| 40 m | 7.247 MHz | 700D | Evenings, weak and fading |
| 20 m | 14.236 MHz | 1600 | Daytime, longer paths |
Some regions also keep local centres — 3.693 in the UK, 7.045 in Argentina, 14.240 in the US — so a quick look at freedv.org is worth it. The FreeDV Reporter page remains the easiest way to find an active station at any hour.
When it misbehaves
| Symptom | Most likely cause |
|---|---|
| FreeDV will not key the radio | Wrong rig model (IC-7300 instead of IC-7300MK2), wrong COM port, or another program (such as WSJT-X) holding Serial Port A |
| No audio in or out | The wrong sound device is selected — the Radio Device must be the radio's USB sound device, not the laptop's own sound card |
| It never reaches SYNC | You are not on the centre frequency, or the two stations are in different modes |
| Permanent robot sounds | The signal is below the decode threshold — drop to 700D, add a little power, or wait for the fade to pass |
Etiquette is simple: wait for the SYNC indicator before speaking, state which mode you are using, and then ragchew the way you would on SSB. That is genuinely all there is to a first contact.
Written for baron.id · 73 de YB1CPT